Iterating with Illustration

To shake up my curriculum this year with all of the Covid constraints and not having a makerspace to utilize, I’ve been leaning pretty heavily on using Illustrator for my 6th – 8th grade classes. I’ve always struggled with getting my students to get playful with the iterative process and using Google Slides as a digital workbook has been a real boon to the process.

To kick off my Illustration Unit with my 7th graders, we watched the Netflix Abstract episode featuring Christoph Niemann. Since my students are all native New Yorkers it was fun experience their reactions to the sections on his love of the city and how he’s used it as inspiration for his work. I rarely watch hour long pieces with students but as I stopped the episode throughout to ask questions, it was amazing to see how engaged they were on how he played with his illustrations and was constantly experimenting.

At the beginning of the episode, he shows a little book that uses a flat iron image as a creative exercise. I then turned that exercise into a Google Workbook where my students had to drop in each iteration for all the images I was asking them to make a variety of iterations with.

It’s been so much fun checking their workbooks after class to see how they’ve transformed the flat iron, really quite delightful. Seeing their Illustrator skills progress and their ability to be fluid with their creativity and not as fixed on being finished is also a real win. They’ve transformed the flat iron into things like a blender, panini press, shoe and sewing machine all on their own.

After they utilized the flat iron image, I also gave them a lightening bolt, a bullseye and plus sign to experiment with. The lightening bolt was definitely the hardest. The Google Illustration Workbook is below for you to take a look!

If you want to take a look at the workbook, you can take a look here.

TurtleStitch & Embroidery

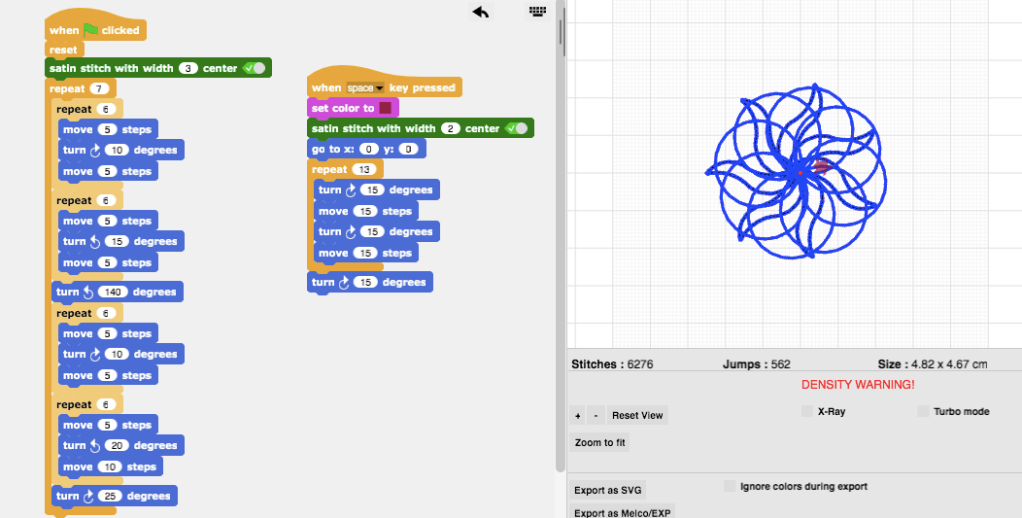
One my first efforts this school year to increase the desire of my girl students to use technology while in the makerspace was to get a embroidery machine. I’ve been spending time with TurtleStitch to plan how to use it in my classes. It’s such a fun program to experiment with and the possibilities seem to be endless.

As I’ve experimented with TurtleStitch more and more, one warning that kept coming up was “DENSITY WARNING!”. I decided to embroider one design with that warning just to see what would happen. The design version on the right has a running stitch and the design on the left be a satin stitch to better understand the warning. The running stitch was fine but the satin stitch was not a success. It didn’t upset the machine but the back of the design was pinched downwards where the density was pretty intense.

Backing of the Density Warning

Going forward I will definitely take that warning to heart. It’s so nice to visualize what a warning on a application turns into. Sadly it seems like most of my TurtleStitch designs have that warning and I’ll just have to spread out the designs more to overcome the issue.

The Brother PE800 Embroidery Machine is a dream. Seeing student’s eyes light up when I have it running is amazing. Since my school is an Apple school, bringing TurtleStitch designs into software to add elements to the designs hasn’t been as easy as I hoped. I turned to Embrilliance Stitch Artist and it’s worked nicely but it won’t be possible to get it onto student computers which is a bummer since it requires a license. I’m still searching for alternatives and will keep you posted!

Pop Art Landscape Project


The first project I complete with my 6th graders borrows inspiration from Roy Lichtenstein’s landscapes. It acclimates my first time Photoshop users with how layers work as well as how to utilize the paint bucket, brush and shapes tools.

I love this project because it allows for my student’s personalities to come through and helps me to get to know them sooner than later.

The biggest challenge for learning Photoshop is the layers tool. It can take a few mistakes for them to understand layers but it is important to let students fail so they came come out on top. It’s also interesting to see how students decide to use BenDay Dots in their designs. It’s so wonderful to see them all do different things from on another!

The project details can be found here.